
No matter if you’re installing it in your own front yard, or hiring a professional, it is helpful to know the steps for how to lay sod in the fall. Ranchers landscaping has created a guide to help you install sod in the Austin area like a professional.
When Is the Best Time for Laying Sod?
You can successfully lay sod at any time of the year, that’s right even in winter. But because you can lay sod at any time of the year doesn’t mean you should. The time of year you choose to lay it will affect the health and growth of your new grass. The best time to lay new sod is early or mid-fall. During the fall the heat of the summer has cooled and usually, there is more rain. This reduces the risk of sod overheating or drying out. This combination makes the perfect climate for the sod to root and establish before winter dormancy. While going into the winter months, your lawn will be healthy, full, and easy to green up in the spring.
Steps to Laying Sod
Laying sod seems like a more intimidating task than it actually is. We have laid out an easy 7-step guide to help you with your next landscaping project! For best results, lay the sod as soon as possible after delivery. Try to complete steps 2 and 3 before your grass is delivered.
Step 1: Choose and Order your Grass
Selecting your grass is arguably one of the most enjoyable part of the process. Of course, you’ll look to find a grass that increases the aesthetic and curb appeal of your lawn, but there are other elements to keep in mind. First research the climate of the area you are located in. You want to make sure the grass you select fits the environment and climate you live in.
Next, familiarize yourself with the different grass characteristics. Grass types vary in color, texture and other physical aspects. These characteristics affect the amount of maintenance it requires. Make sure the grass you choose matches the right amount of maintenance and time you want to put into it.
Step 2: Measure Your Installation Area
Understanding how much sod you will need to order can be complicated and frustrating. We found an efficient tool to make it easy. The Area Calculator Tool starts by entering your address, drawing over where you plan to install new sod, and lastly, request a free quote!
You’ll likely want to order a little more than you’ve calculated. It’s not hard to calculate the perfect amount, yet still be short a few rolls.
Step 3: Clear and prep your Installation Area
Proper preparation makes it easier for new grass roots to penetrate its new soil. There should not be any debris or vegetation on the soil of your installation area. Bare the area by using a sod cutter or roto-tiller to remove the top layer of grass and debris.
Now that the area is clear you’ll need to grade and level the soil. Using a rake or a hoe, reduce compacted soil and pull up buried weeds or vegetation. Next, smooth out the soil and create a leveled area. Settle the soil by wetting the area and lastly smooth the soil’s surface once again.
Step 4: Roll Out New Sod
Lay your sod as soon as possible upon delivery. NEVER water fresh sod while it’s rolled up.
 It will cool down the grass temporarily, then speed up the growth process causing it to overheat and most likely die. Unstack your sod from the pallet 48 hours upon delivery. This will allow air circulation and avoid the sod from overheating.
 Start by laying the first strip along a straight line. Use a string for a guide. Don’t overlap edges but make sure ends are joined tightly. Use a brick pattern to stagger the joints. Lastly, cut sod with a sharp knife or landscaper edger to fit curves and edges.
Step 5: Water Rolled Out Sod
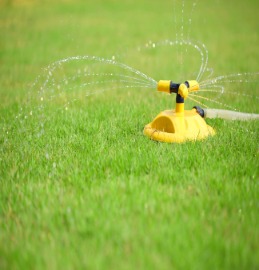 Water the freshly laid sod section by section. Once a section is completed, water the section. Then repeat on to the next.
Step 6: Roll Over Installation Area
Roll over the new sod using a lawn roller or edger to even out the turf joints and eliminate air pockets. This ensures good contact between the turf roots and soil.
Other Key Factors for Laying Sod
Maintenance is key
Maintaining a healthy mowing and watering schedule is important to make sure during the first 14 days the sod is moist, but not too wet. A great rule to go by is to keep the soil moist three inches below the surface when establishing. Mow your new lawn one week after installation. Make sure to mow perpendicular to the direction in which it was laid. If you are laying in the fall make sure to mow once a week until winter.
Fertilize your Lawn
To promote healthy rooting and establishment, fertilize your lawn after laying the sod. One option is to use new sod fertilizer instead of a regular fertilizer. New sod fertilizer will give your newly established lawn the correct amount of nutrients to promote root growth.
Pay Attention to Timing
In the fall, you have to pay more attention to the timing of your installation than you would during any other season. You need to give the sod enough time to form its root system before winter starts to set in. Warm season grasses tend to go dormant when the weather hits below 60 degrees. After this your sod will be unable to continue developing its root system. For Sod to develop a strong root system, it usually takes up to six weeks. It’s still about two weeks for the shallow root system to form. Give your sod at least 4-6 weeks to grow before the ground is expected to freeze.
To save time and physical labor there is always the option of hiring a professional landscaping service to assist you in all your lawn care and landscaping needs. At Ranchers Landscaping we specialise in complete landscape renovations with sod and mulch installations in Northern Austin. Contact us for your free quote today!